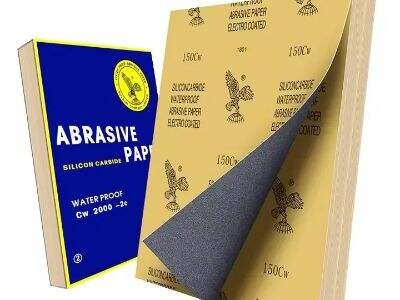
Руководство по различным типам шлифовальных дисков
Шлифовальные диски доступны в широком разнообразии форм и размеров, что позволяет подобрать их под конкретную задачу. Грубое и финальное шлифование — для обоих этих задач они идеально подходят! Ниже приведены наиболее распространенные типы шлифовальных дисков:
Лепестковые диски: одинаково удобные, эти шлифовальные диски могут использоваться во многих проектах.
Шлифовальные ленты: длинные узкие шлифовальные диски, отлично подходящие для обработки широких поверхностей.
PSA-диски: шлифовальные диски с PSA (самоклеящимися) дисками, легко устанавливаются на шлифовальный инструмент.
Липучка. Шлифовальные круги с липучкой позволяют быстро и легко менять зернистость, а также продлевают срок службы абразива.
Волокнистые круги: шлифовальные круги прочные и долговечные.
Как выбрать нужную зернистость для ваших задач
Выбор оптимальной зернистости для вашего проекта важен для достижения успеха. Номер зернистости шлифовального круга указывает на размер абразивных частиц на поверхности круга. Меньшие номера зернистости означают более крупные абразивные частицы, которые используются для грубой шлифовки. Чем выше номер зернистости, тем мельче абразивные частицы, а значит, шлифовка будет тоньше.
Что означает каждое число
Размер зерна в шлифовальной пасте определяется количеством абразивных частиц на квадратный дюйм. Ниже приведена примерная таблица соответствия номера зернистости и ее назначения:
40-60 зерно: грубый шлифовальный круг идеально подходит для удаления краски, ржавчины и неровностей поверхности.
80-120 единиц - Средняя зернистость идеально подходит для удаления незначительных поверхностных дефектов, таких как следы от легкой шлифовки или небольшая ржавчина с неокрашенной металлической детали.
-150-240 номеров: Используется для окончательной шлифовки и удаления материала.
320-600 номеров: Тонкие абразивы подходят для шлифовки, измельчения, полировки и резки металла и неметалла.
Советы по получению гладкой поверхности
Для получения гладкого результата при работе над масштабным проектом мы рекомендуем начать с крупнозернистого шлифовального диска, чтобы удалить дефекты и неровные стороны. Начните с крупнозернистых шлифовальных дисков, чтобы обеспечить гладкий, полированный результат. Просто убедитесь, что вы шлифуете вдоль волокон древесины для достижения наилучшего результата.
Совершенствуйте свои проекты с помощью номеров зернистости
Изучив номера зернистости шлифовальных дисков, вы сможете выбрать правильный вариант для каждого этапа вашего проекта. Начинайте с низкого номера зернистости и постепенно переходите к более высокому для получения гладкой поверхности. С правильными шлифовальными дисками и зернистостью вы можете улучшить свои проекты и каждый раз получать профессиональный результат.
В конечном итоге, бумага для шлифовки с 6 дисками является важным руководством для каждого любителя своими руками или профессионального мастера. Зная, что означает каждый класс абразива, и какой из них выбрать для конкретного проекта, вы сможете добиться гладкой и профессиональной поверхности. Просто помните, что начинать следует с грубого абразивного диска, постепенно переходя к более мелкому или среднему для получения гладкой поверхности. Ниже вы можете увидеть, какие абразивные диски и классы абразива сочетаются друг с другом. Видео Pangea: правильные абразивные диски, подобранные вместе с подходящими классами абразива от Pangea, помогут вашим проектам достичь следующего уровня.
 EN
EN
 AR
AR
 NL
NL
 FR
FR
 DE
DE
 KO
KO
 PL
PL
 PT
PT
 RU
RU
 ES
ES
 AF
AF
 LA
LA


